CSV
CSV allows you to display data from a CSV-formatted file in Smartsign.
This makes it possible to integrate data from spreadsheets, exported reports, or other external systems into your digital signage content.

CSV (Comma-Separated Values) is a simple text-based format where each row represents a record and each column is separated by a defined delimiter such as a comma or semicolon.
This datasource is intended for users with basic technical knowledge of CSV file structures. While powerful, it may require careful configuration depending on the file format.
How it works
When connected, Smartsign retrieves data from the configured CSV file URL and makes it available in the Template Creator.
The data can be fetched either:
- Via the Smartsign server (default, cached for performance and security).
- Directly from the source by the screen or browser, depending on configuration.
The retrieved data can then be databound to text, image, or other elements in a template.
Each value in the CSV file is selected using Column and Row numbers in the Template Creator.
Requirements
To use the CSV datasource, you need:
- An accessible CSV file available over HTTP or HTTPS.
- The file must be encoded in UTF-8.
- A correctly defined separator/delimiter.
- A defined quote character (if your CSV uses quoted values).
If you plan to use direct requests, the source must comply with standard browser security rules (CORS).
Set up the datasource
The first step is to configure your datasource with the CSV file you want to use.
In this example, we will use a basic URL without any request headers or additional requirements.
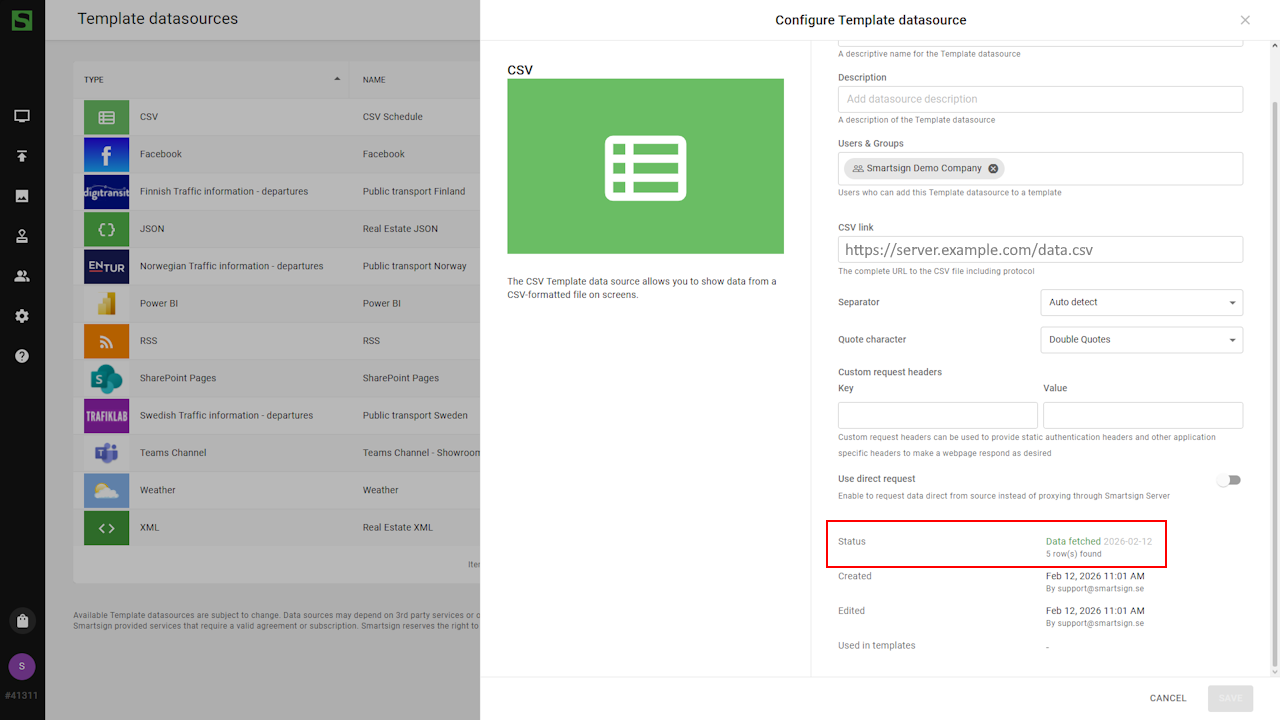
The example URL look like this: https://server.example.com/data.csv
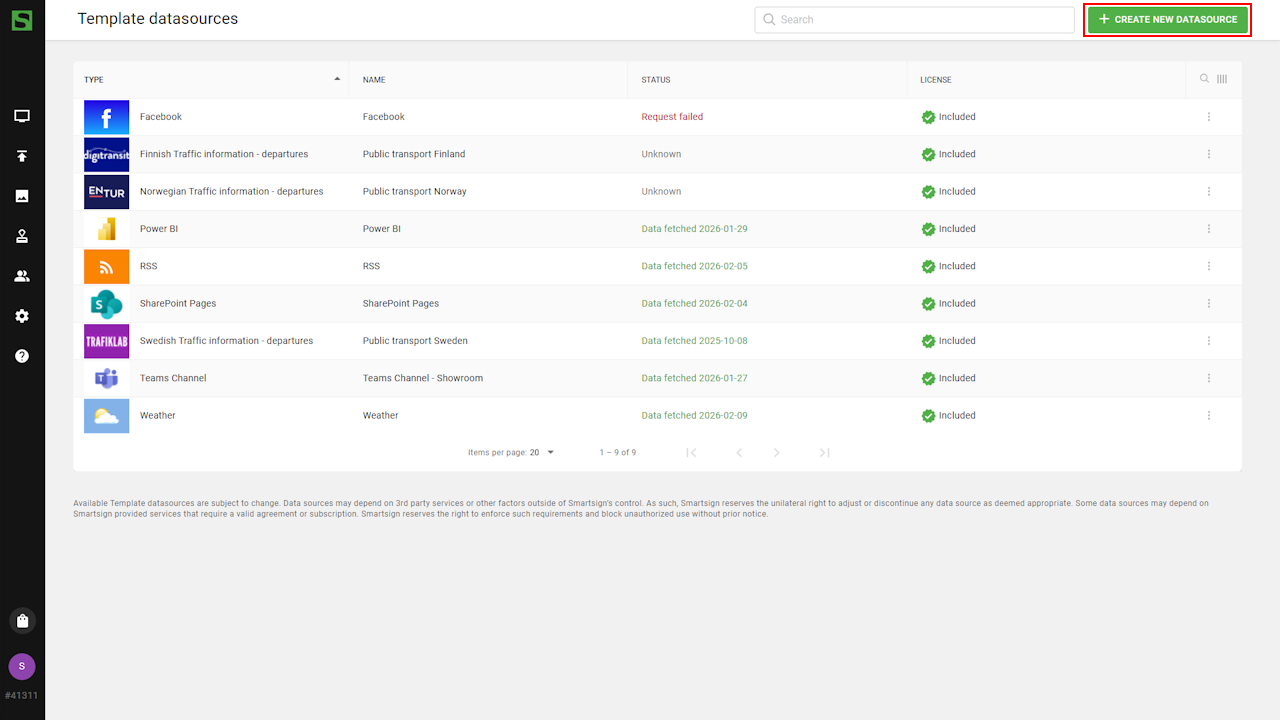
- Go to Template datasources and select create new datasource.
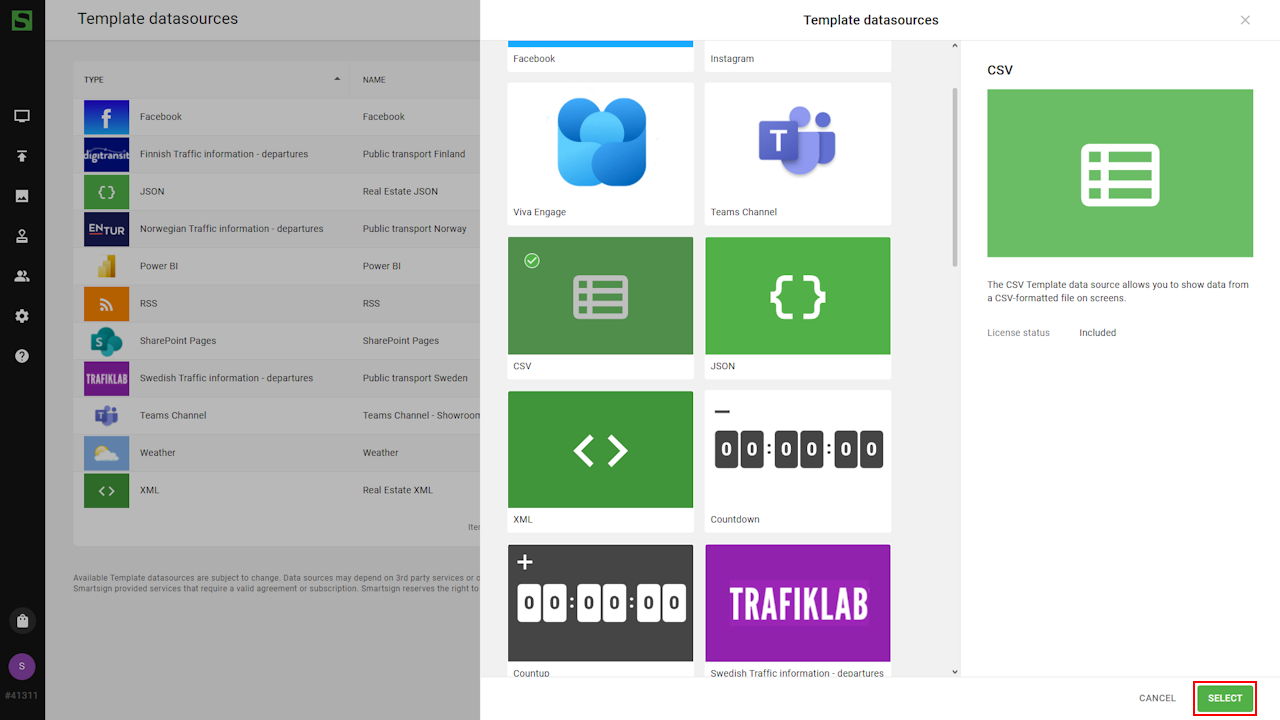
- Select the CSV datasource.
- Configure the datasource by adding Name, Description and CSV Link.
- Select the appropriate Separator and Quote character
for your CSV file.
These must match the format used in your file (for example
;as separator or"as quote character). For a detailed explanation of these settings, see the section below.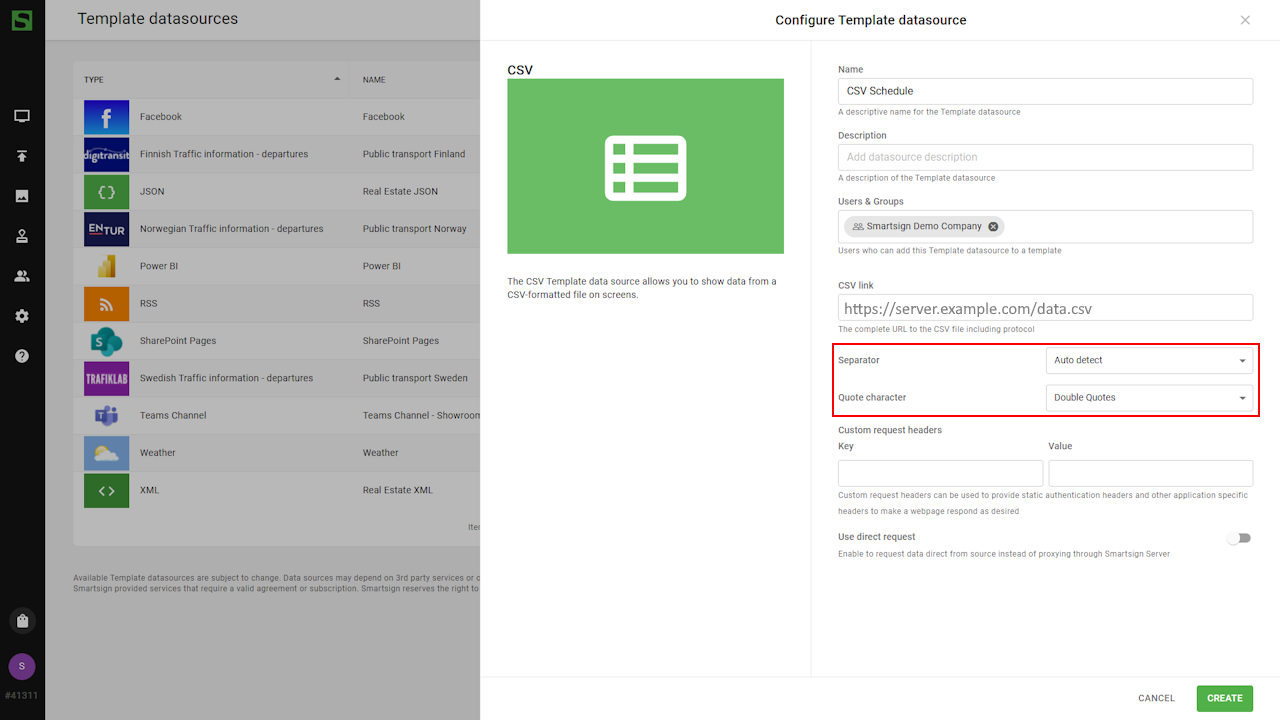
- Click Create and verify data connection to see if data can be fetched.
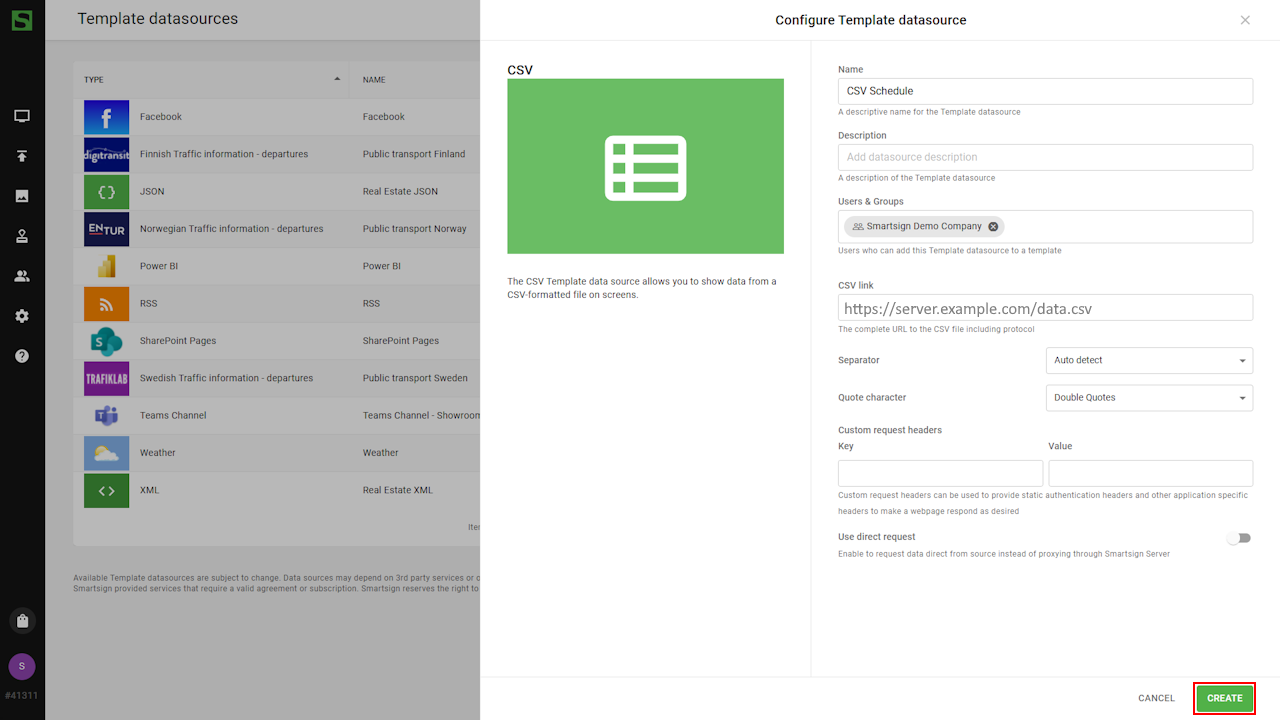
- Once created, you can confirm that data has been fetched.
About Separator and Quote character
Correct separator and quote character settings are essential for Smartsign to correctly interpret the structure of your CSV file. These settings must match the format used when the file was created or exported.
Separator
The separator (delimiter) defines how columns are divided in each row of the CSV file.
| Option | Description |
|---|---|
| Auto detect | Smartsign automatically detects the separator based on the file content. Recommended if you are unsure. |
Colon : | Columns are separated by a colon. |
Comma , | Standard CSV format where columns are separated by commas. |
Equals sign = | Columns are separated by an equals sign. |
Pipe | | Columns are separated by a vertical bar character. |
Semicolon ; | Common in European CSV exports (e.g., Excel regional settings). |
| Space | Columns are separated by a space character. |
| Tab | Columns are separated by a tab character (TSV format). |
Quote character
The quote character is only needed when a value contains the separator character.
In the schedule example used in this article, quotes are not required
because none of the values contain the separator character ;
as part of the value itself.
However, if a value includes the separator, it must be wrapped in quotes.
For example, if a name contains a semicolon:
Name;Date;Shift
"Matti; Virtanen";11.11.2022;morning
The quotes tell Smartsign that Matti; Virtanen is one single value
in the Name column.
Without quotes, the semicolon inside the name would be interpreted as a column separator, and the row would be split into too many columns.
Most CSV files use double quotes " as the standard quote character.
| Option | Description |
|---|---|
Double quotes " | Standard CSV quoting format. Most commonly used. |
Single quotes ' | Used in some systems when exporting CSV data. |
Example data
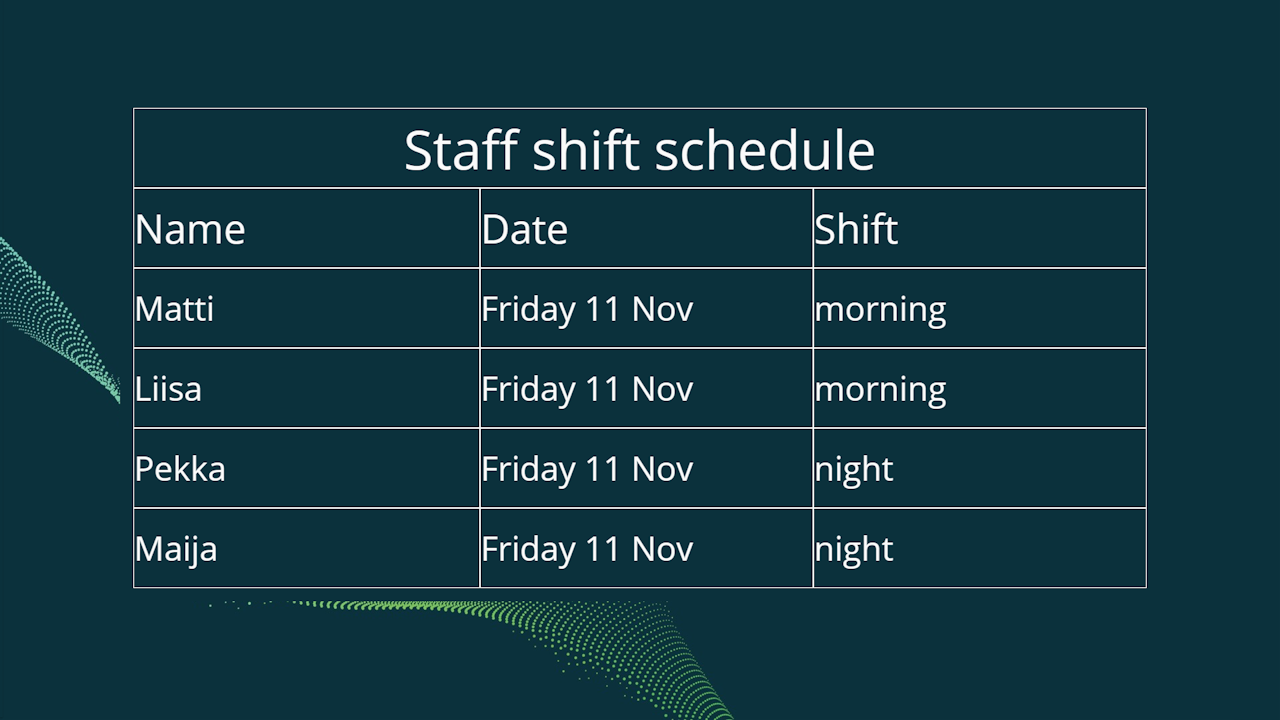
The example below represents a simple staff shift schedule.
In this case, the following values can be displayed in a template:
- Name
- Date
- Shift
Structure
Name;Date;Shift
Matti;11.11.2022;morning
Liisa;11.11.2022;morning
Pekka;11.11.2022;night
Maija;11.11.2022;night
In this example:
- The separator is semicolon
; - The first row defines the column headers
- Each following row represents one scheduled shift entry
Identifying column and row values
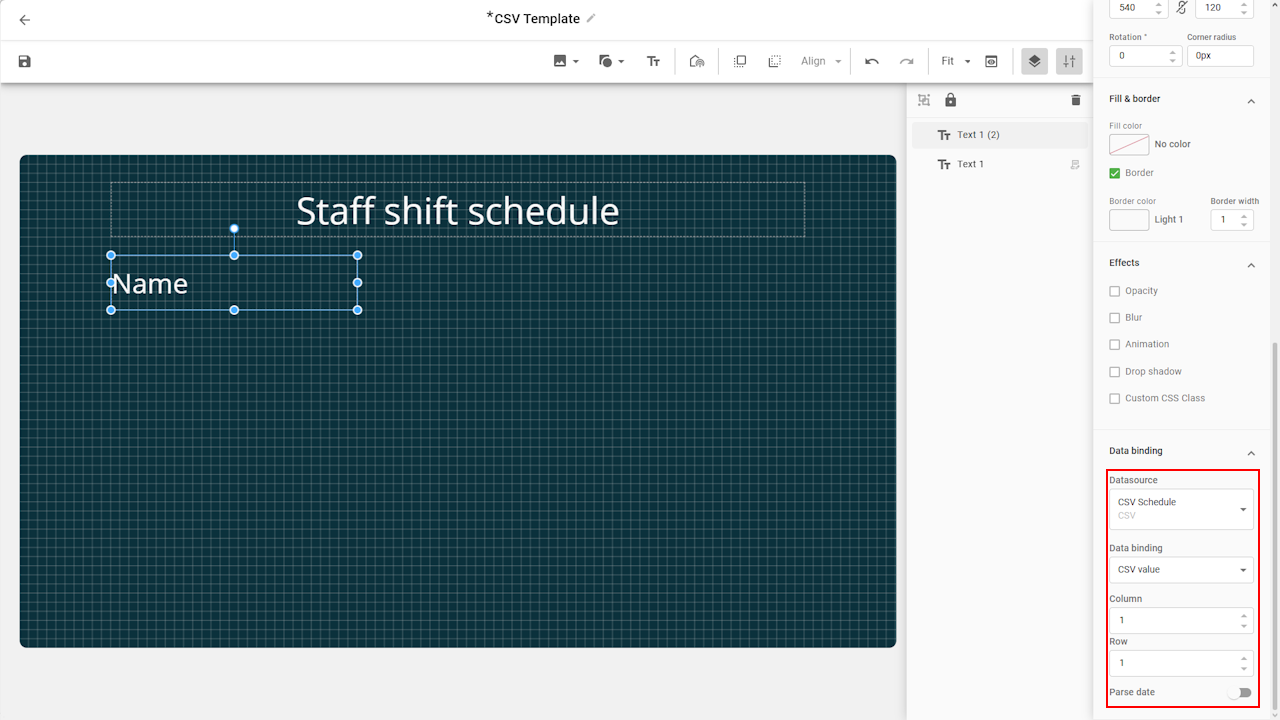
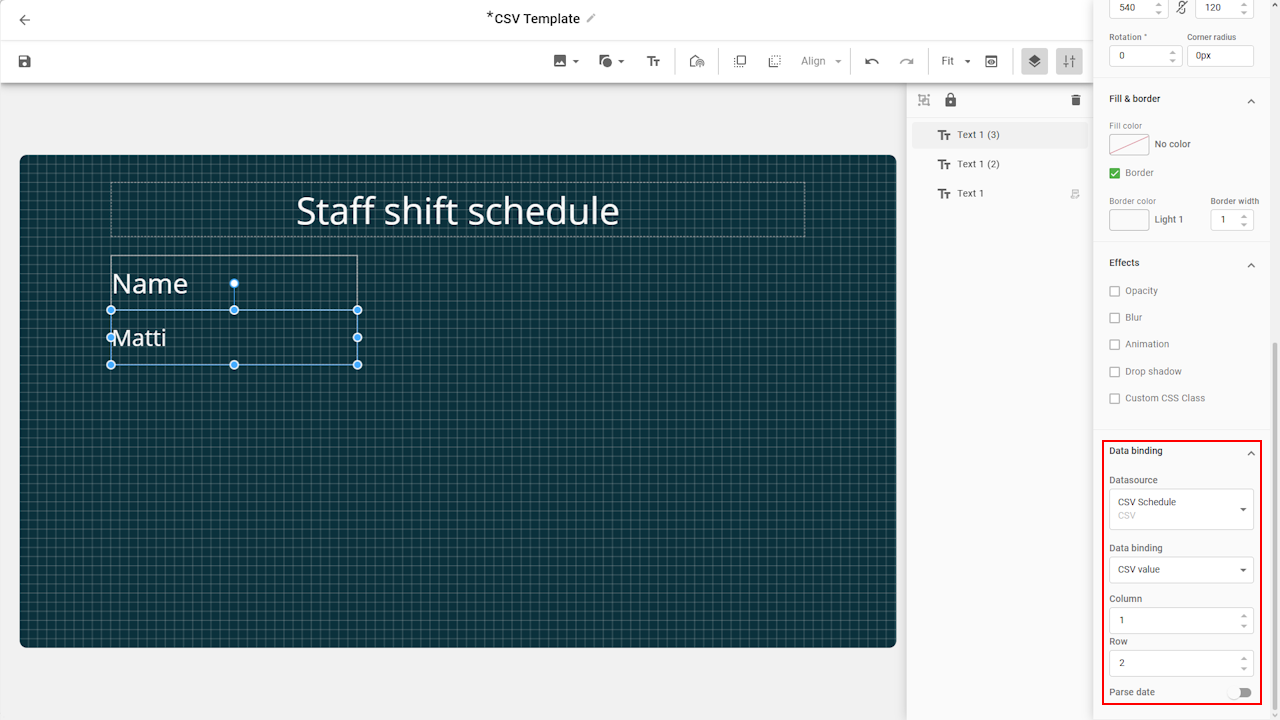
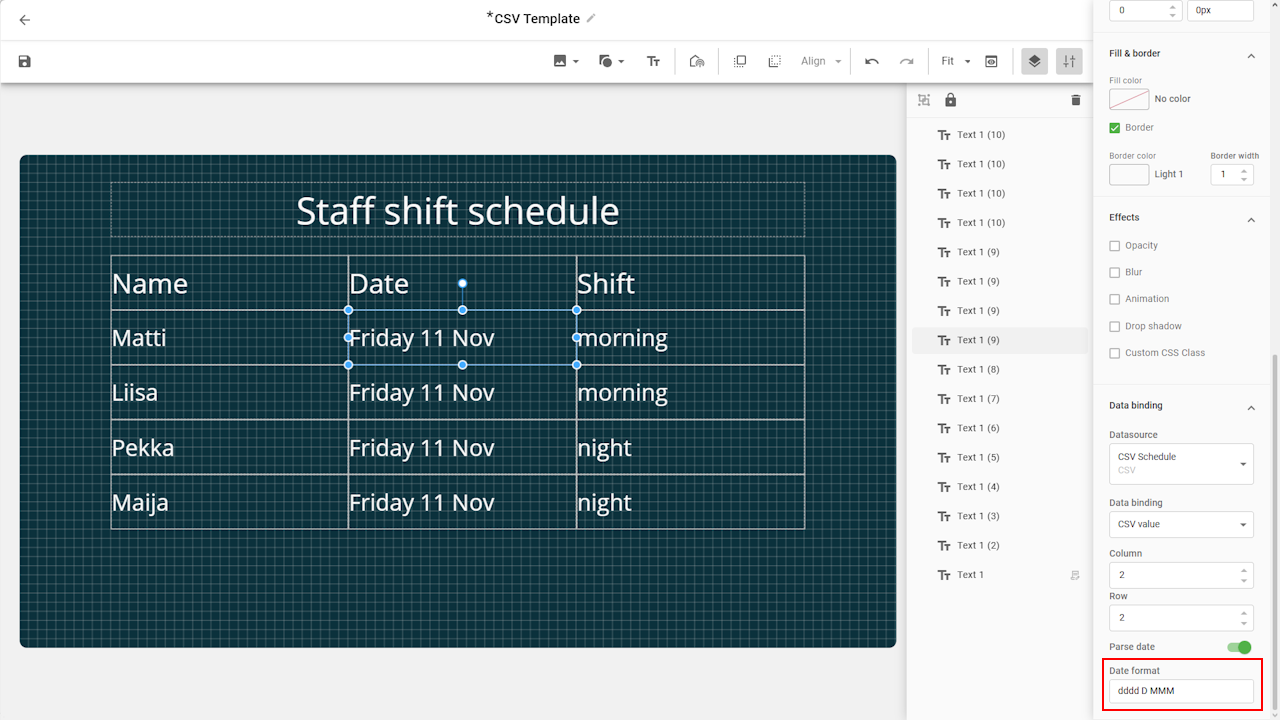
When binding CSV data in a template, you select values using Column and Row numbers.
- Column defines which column in the CSV file to use.
- Row defines which row to display.
- Numbering starts at 1.
- The header row is treated like any other row and must be selected manually if needed.
Using the example above, the following columns can be used:
| Column number | Row number | Value |
|---|---|---|
| 1 | 1 | Name |
| 1 | 2 | Matti |
| 2 | 1 | Date |
| 2 | 2 | 11.11.2022 |
| 3 | 1 | Shift |
| 3 | 2 | morning |
If your CSV file includes headers, they are not automatically detected as labels. To display a header value, you must explicitly select Row 1.
Create a CSV template
When the datasource is configured, you can create a template to display the data.
A template can either be created from scratch, or you can download a suitable template from the Marketplace and adapt it to your needs.
If you are new to templates and template creator, see the Template Creator guide.
In this guide, we will create a template from scratch.
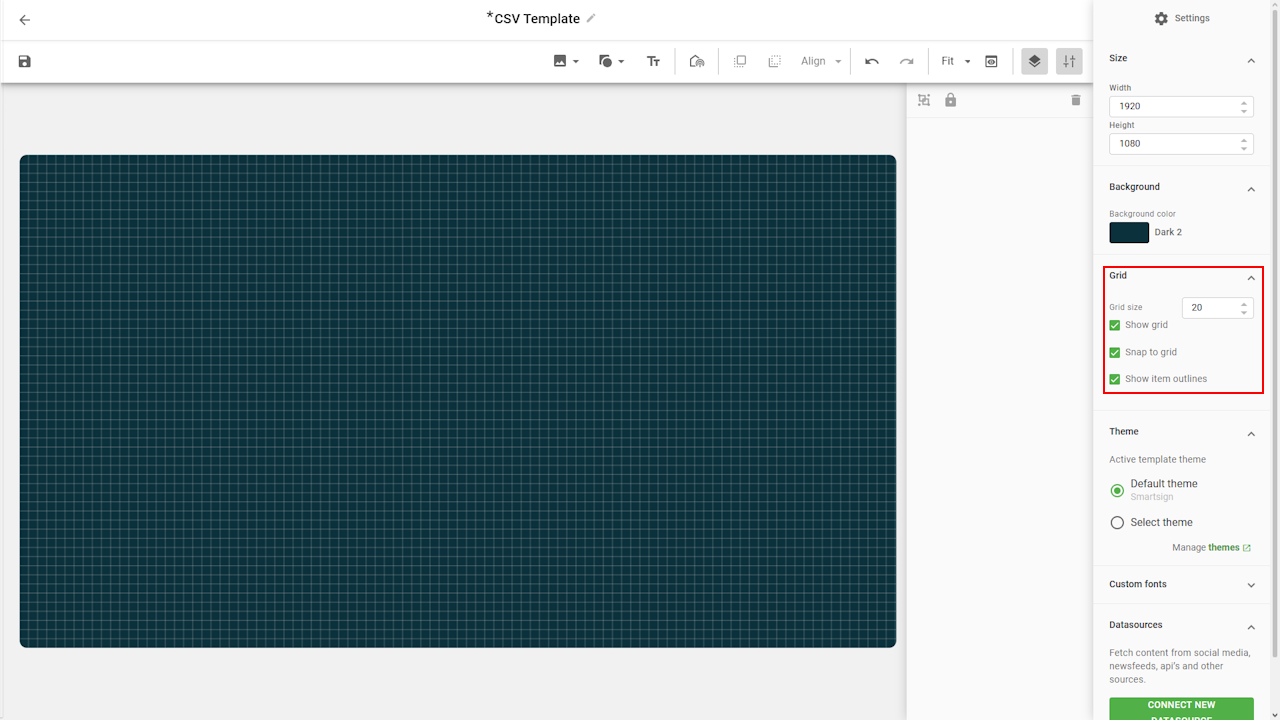
- Go to Templates and create a new template.
- Set base settings such as template size and background color.
tip
Enable grid settings to make it easier to align the textboxes in a table-like design.
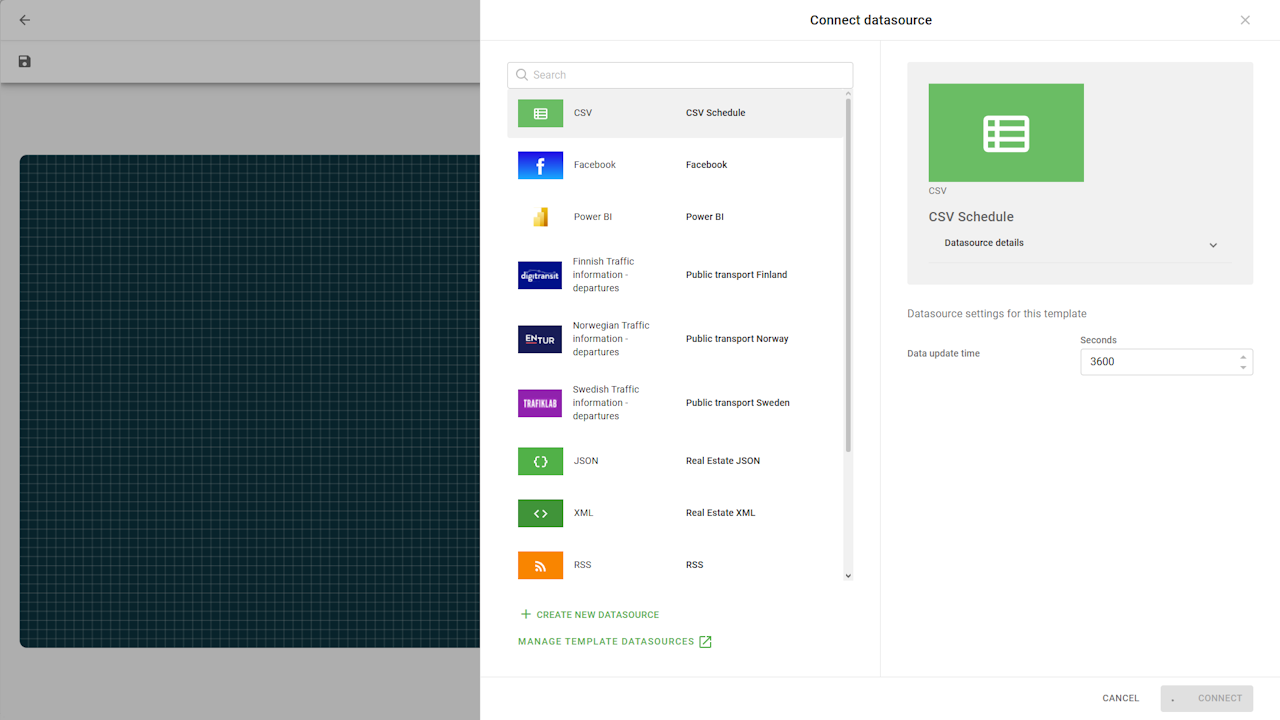
- Select Connect new datasource and select CSV
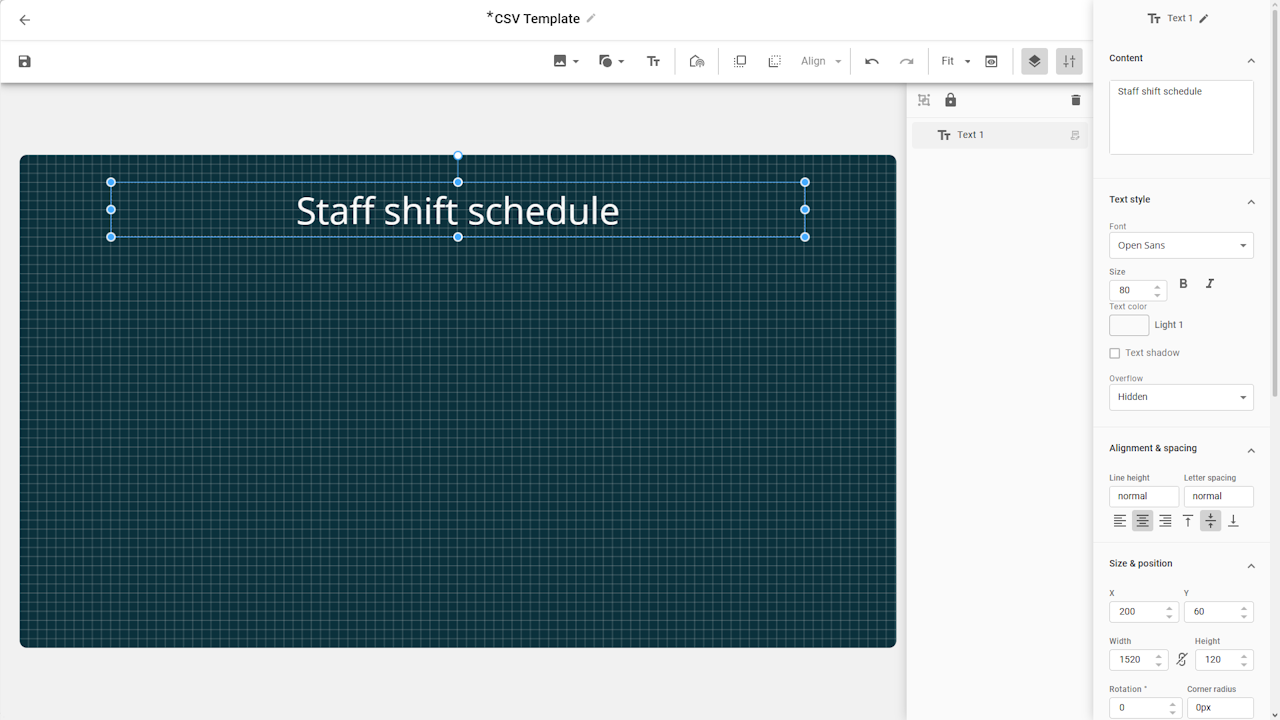
- Add text fields.
- Headline (manual text)
- column 1, row 1 (Header: Name)
- Column 1, row 2 (Matti)
- Headline (manual text)
- Continue adding additional text fields as needed, selecting the appropriate Column and Row values.
- When adding fields containing dates, you can use the Parse date
feature to customize the display format.
- Complete the template by adding any additional design elements as needed.
Datasource configuration options
|
Setting |
Description |
Example |
|---|---|---|
|
CSV Link |
The complete URL to the CSV file including protocol |
https://server.example.com/data.csv |
|
Separator |
Select the separator/delimiter used in your CSV data |
; |
|
Quote character |
Select the character used when quoting data in your CSV data |
" |
|
Data Update Time |
Time in seconds between updates Restrictions (regardless of set value) |
3600 |
|
Special request headers |
HTTP header key and value pairs |
Key =
Authorization |
| Use direct requests |
Enable to request data direct from source instead of proxying through Smartsign Server Server fetched data is cached by the server for 10 minutes for load balancing and security. Direct fetched data is subject to browser security rules |
False |